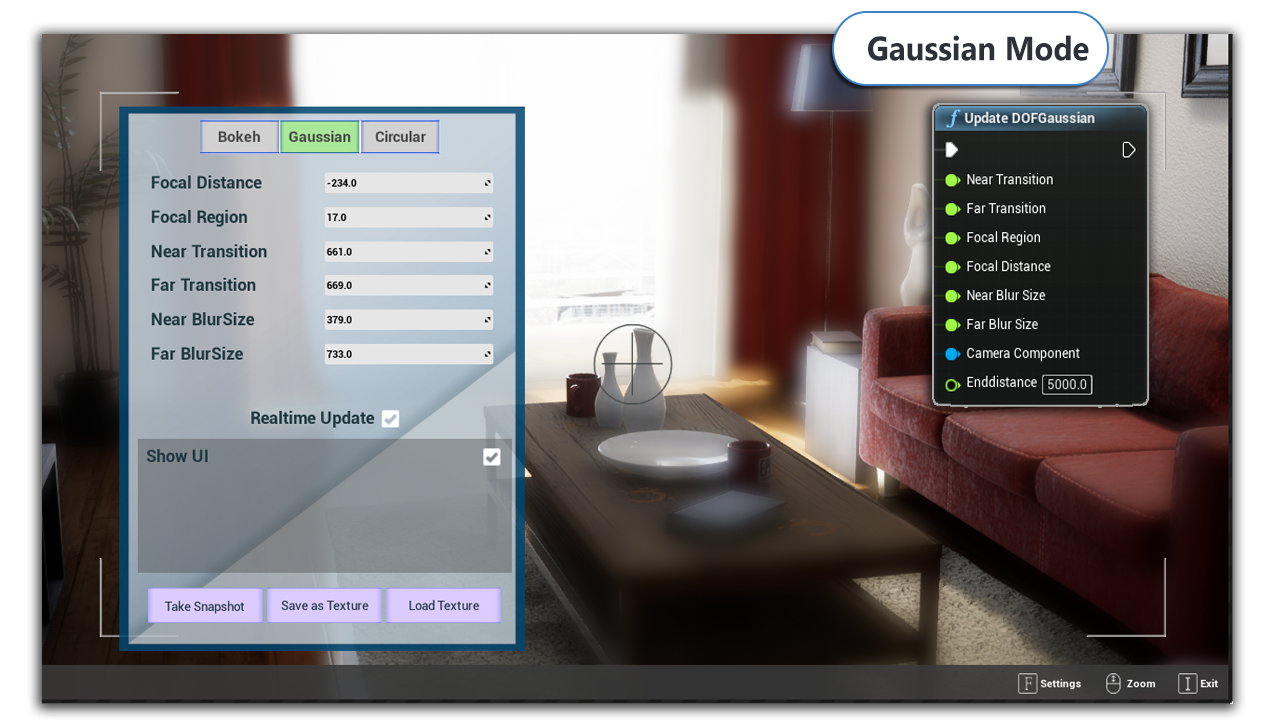
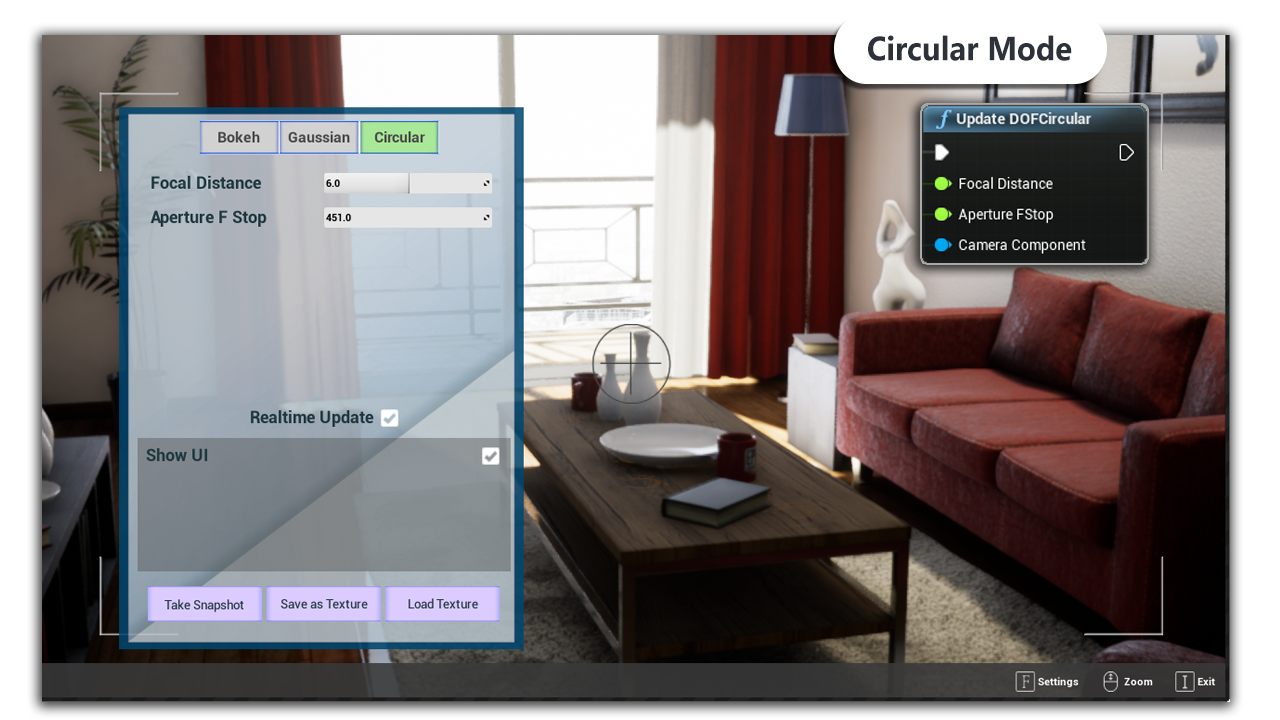
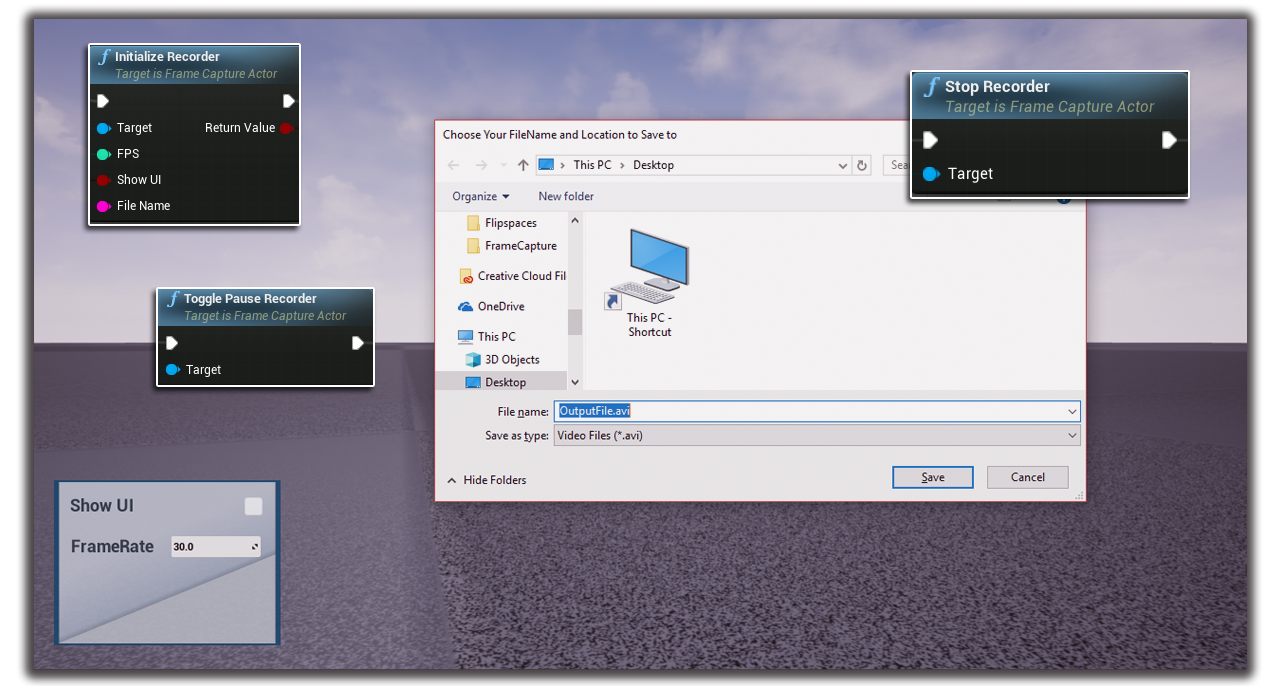
You can take screenshots at any resolution and save to your hard disc. You have an option to use your viewport resolution, or take highres screenshot at custom resolution. You can also Show UI elements in your screenshots. I have used OpenCV
library to capture entire window, so if you are showing UI elements, you need to play in a seperate standalone window, not in your viewport, and you cannot take highres screenshots in this case.
Taking Screenshot is not an instant process and there may be a noticeable time difference between the frame at which the screenshot is requested and the frame at which the screencapture is finished, specially when you have requested a screen capture at
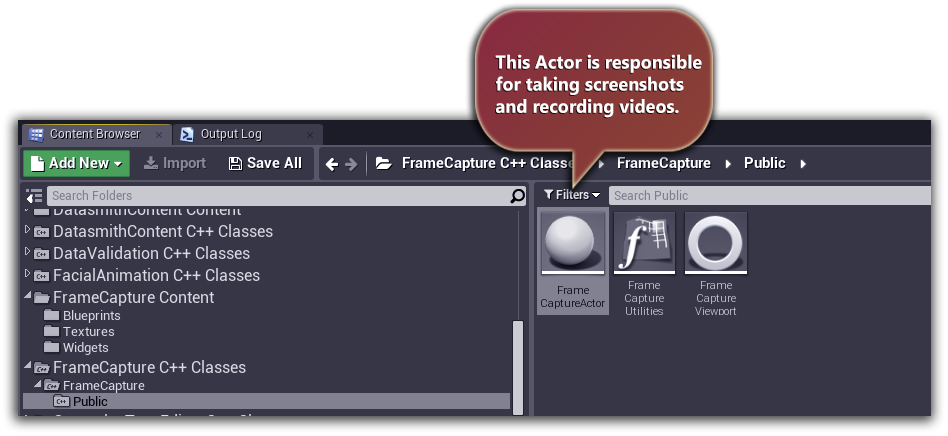
a high resolution (4K and above). To facilitate the process, I have created an actor called AFrameCaptureActor, which is responsible for requesting for screen capture and broadcast notification once the screen capture is finished.
You can either choose to save the screenshot in hard disc or display the result as texture in viewport UI. This actor also records videos, and we will see how in the next section.
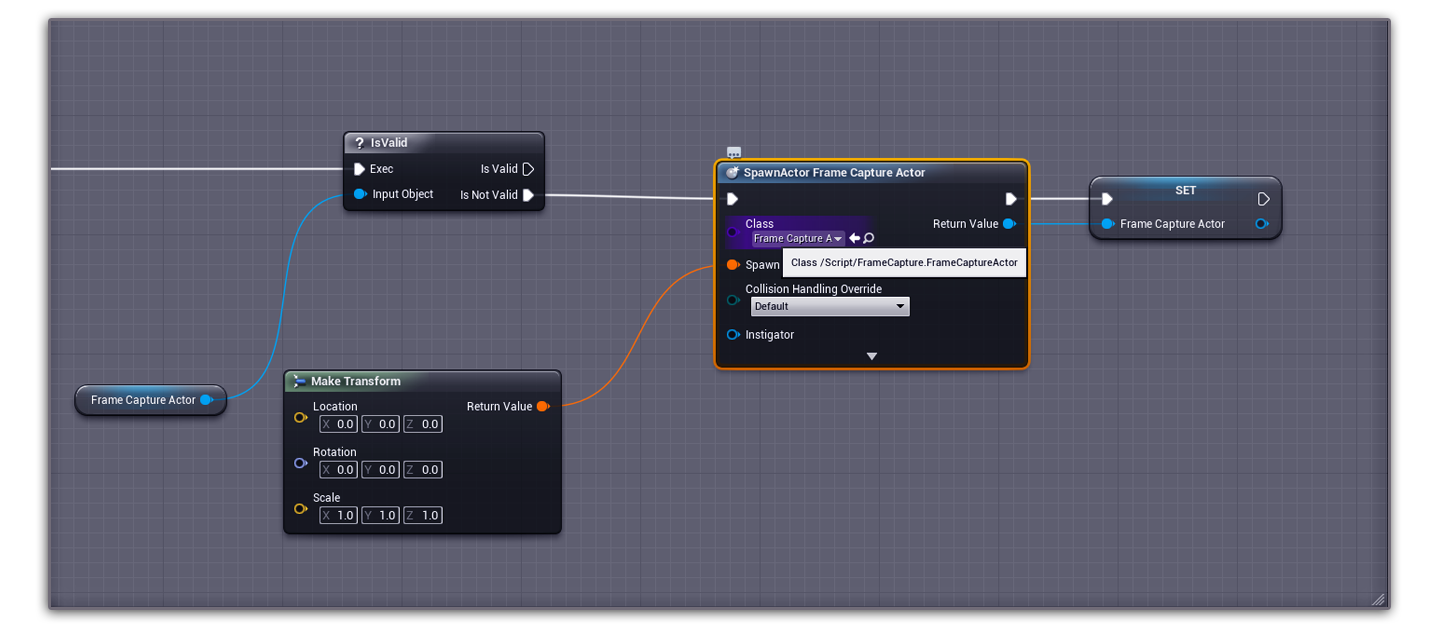
Spawning the FrameCapture Actor
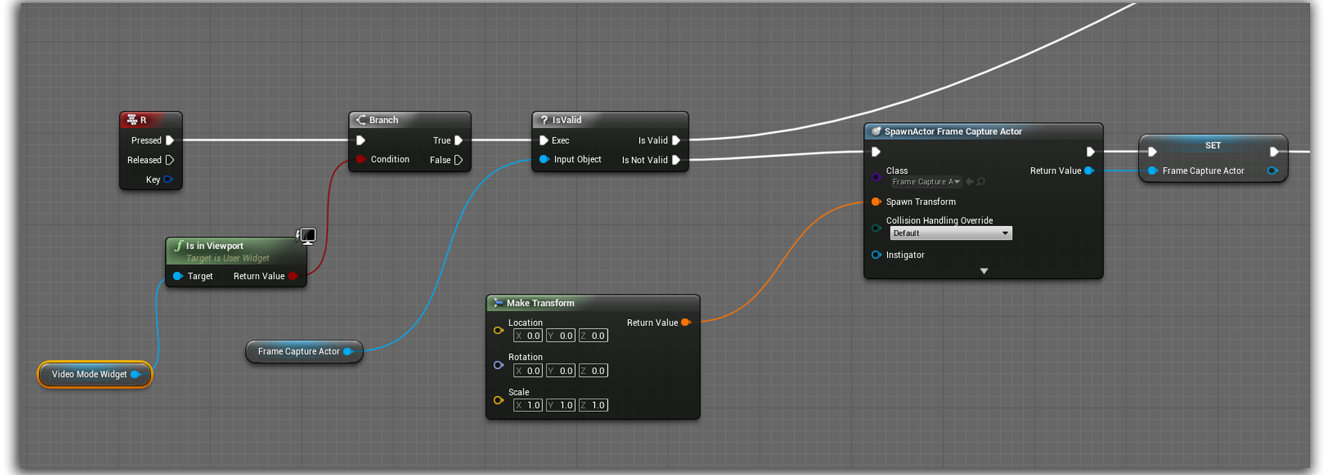
Before you can request your viewport client for a screen capture, you need to spawn an instance of AFrameCaptureActor class. I have created a widget and I am spawning this actor in the Construct event, and saving the spawned actor in a
variable for later use.
Requesting a new Screen Capture
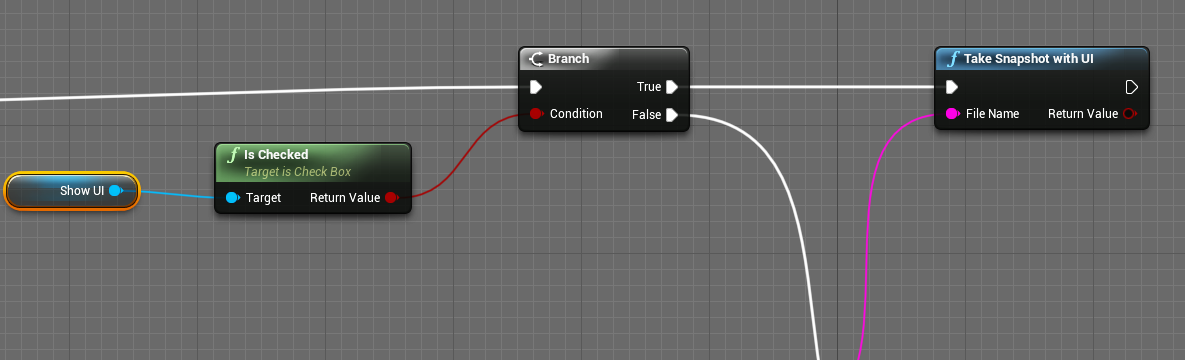
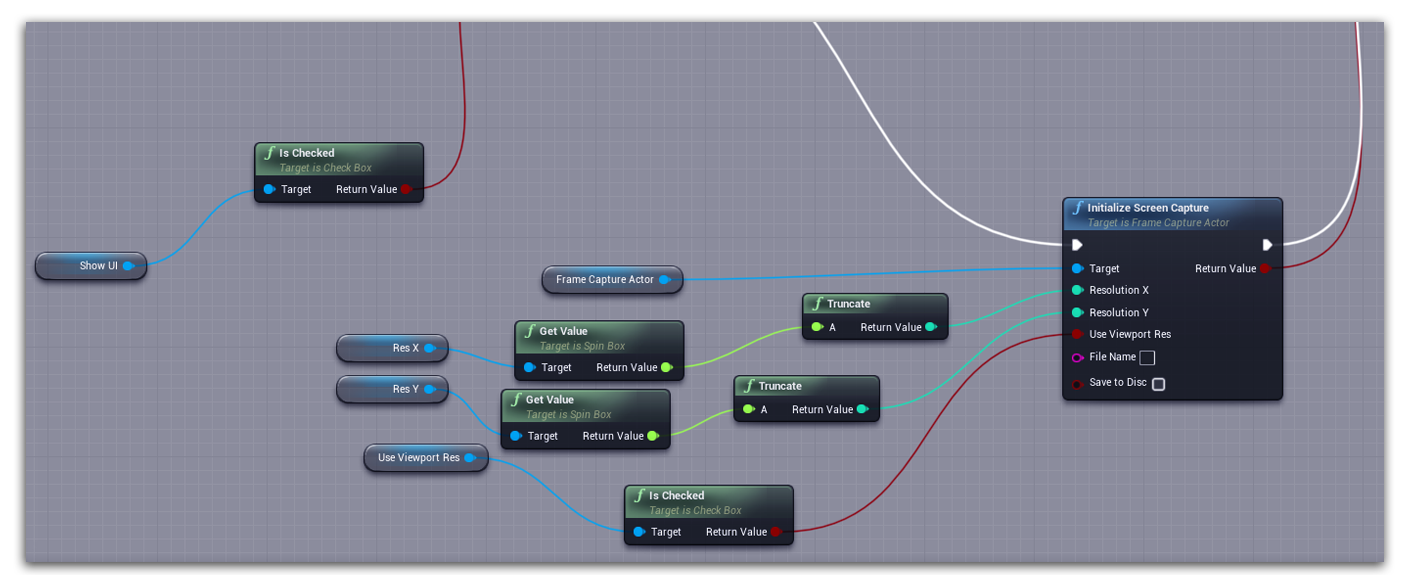
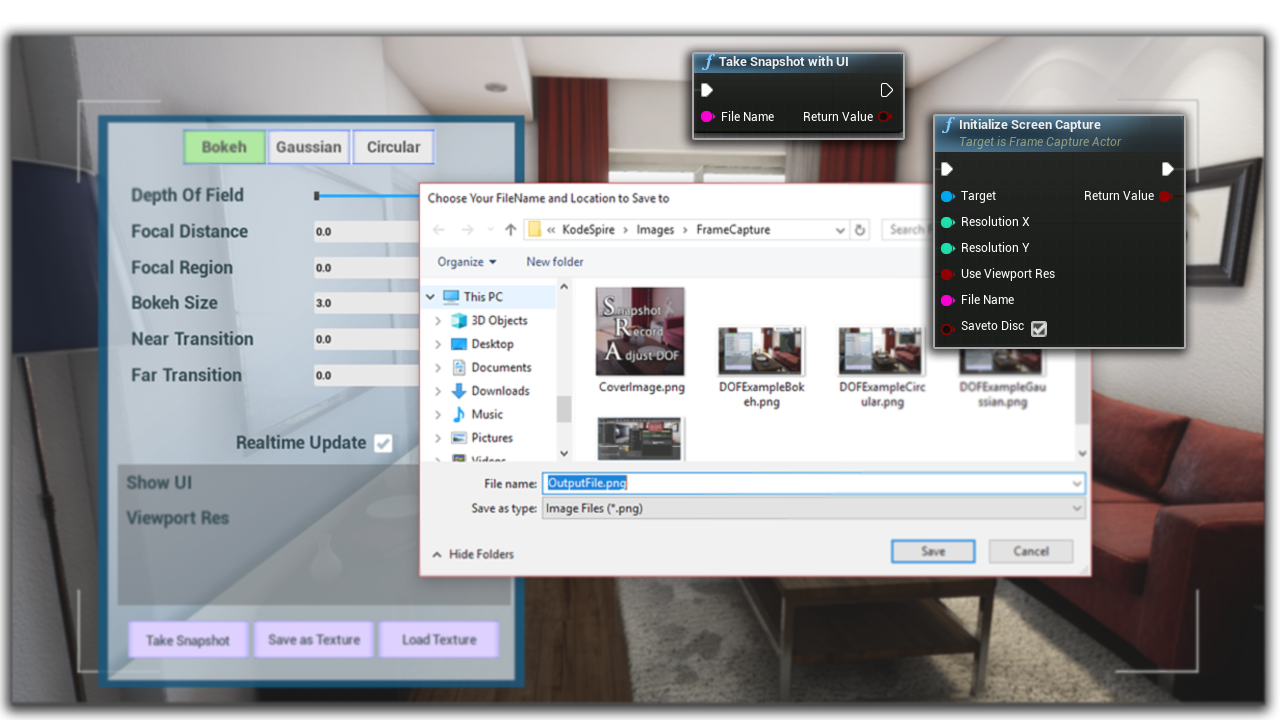
Once you have a valid spawned FrameCapture actor, you are allowed to request for a new screen capture. For initializing a new screen capture, you need to get a reference of your spawned FrameCapture actor, and call the function InitializeScreenCapture.

| Inputs |
Description |
| Target |
The Spawned FrameCapture Actor reference. |
| Resolution X |
Width of the Screenshot. This parameter is not relevant if the user chooses to use viewport resolution. |
| Resolution Y |
Height of the Screenshot. This parameter is not relevant if the user chooses to use viewport resolution. |
| Use Viewport res |
Whether to use Viewport resolution as the Screenshot resolution. |
| FileName |
The file name along with path, where the user wishes to save the Screenshot. Not relevant if the user does not wish to save the Screenshot in hard disc. |
| Save to Disc |
If the user wants to save the Screenshot to the hard disc. You can keep this unchecked if you want to read the captured data as byte array instead and convert into UTexture2D. |
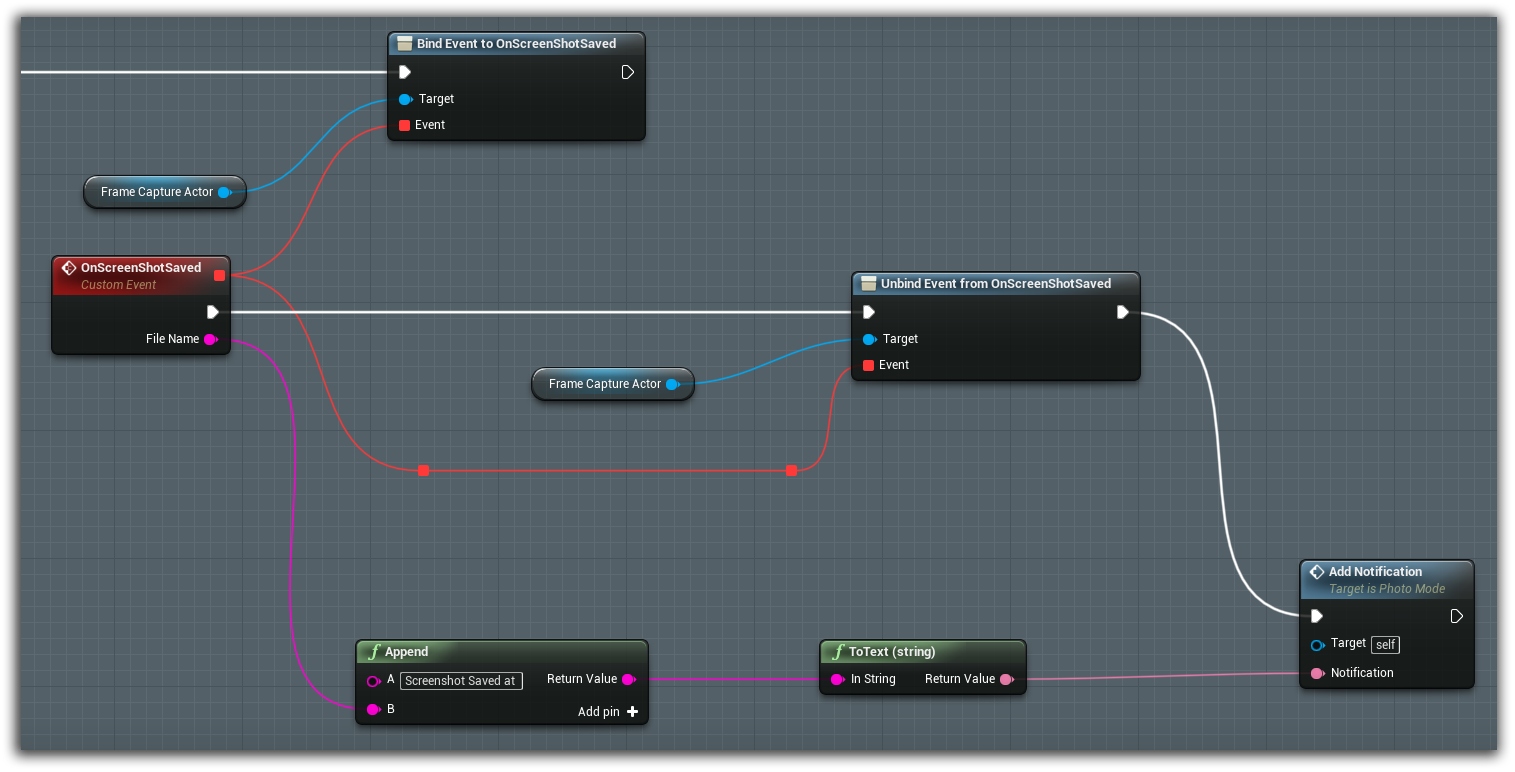
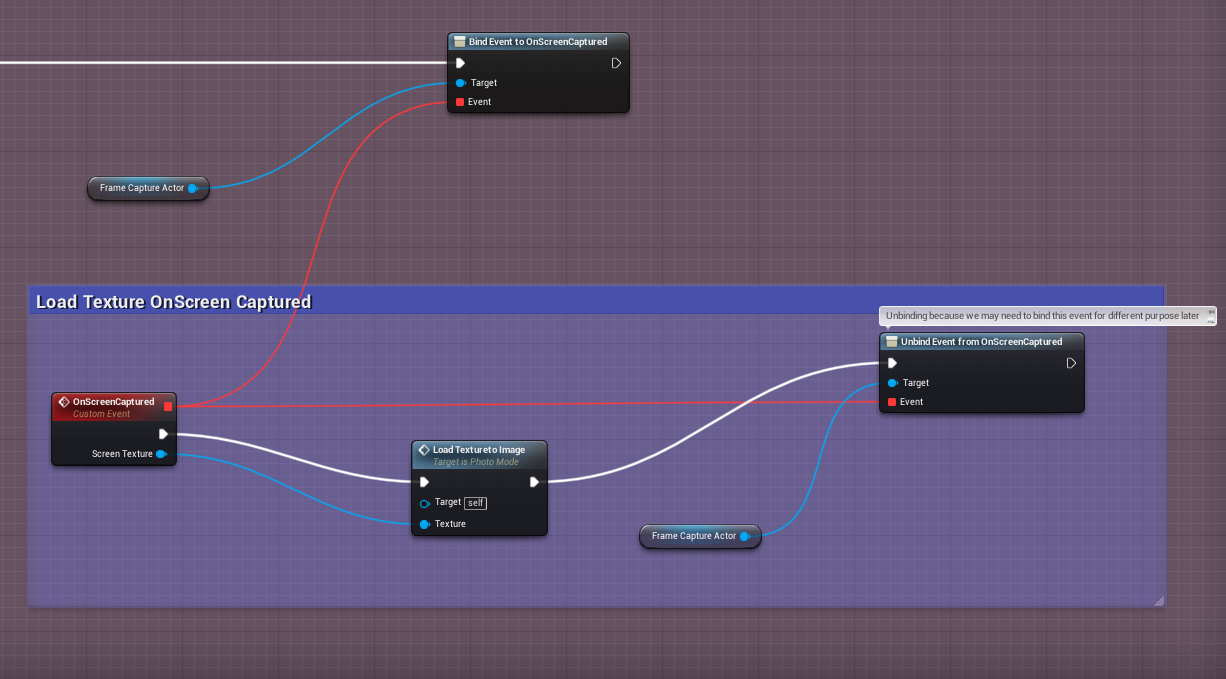
Binding the ScreenshotSaved Event
Since capturing screenshot is not an instant process and happens asynchronously, you have to bind the OnScreenshotSaved event of your FrameCapture actor to get notified to when the screenshot is saved.